Appearance
External Installation - Method 1 (using a script)
WARNING
Remember we'll format the external drive! Back up any existing data you care about.
TIP
If you have issues or just want to do manual partitioning (which often works better) try the alternative installation here.
Installation scripts
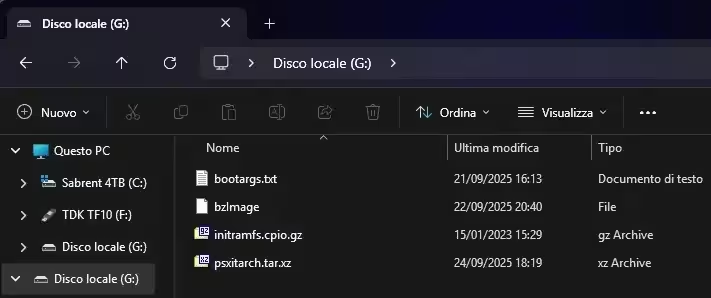
Put the kernel (bzImage, and the bootargs if you need it), initramfs (initramfs.cpio.gz), and your distro psxitarch.tar.xz/gz on the root of a FAT32 formatted drive, like so:
Manual format for big drives
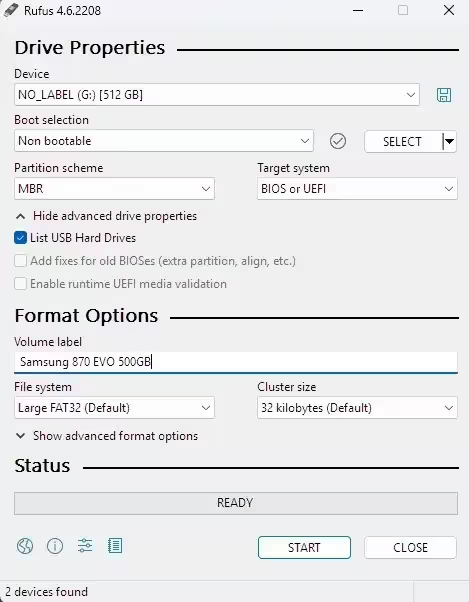
If the drive is larger than 32GB, Windows will dastardly act like it can't format it in FAT32, but only in NTFS or ExFAT, which is just wrong, as FAT32 supports up to 2TB drives. To fix it, go ahead and download Rufus.
- Select "List USB Hard Drives"
- Select "Non bootable" as a type of format
- Select "MBR" as partition scheme
- Select "FAT32" as filesystem
Click start and wait. Once done, place the files on the drive. Plug your drive on the PS4 and continue.
Installation commands
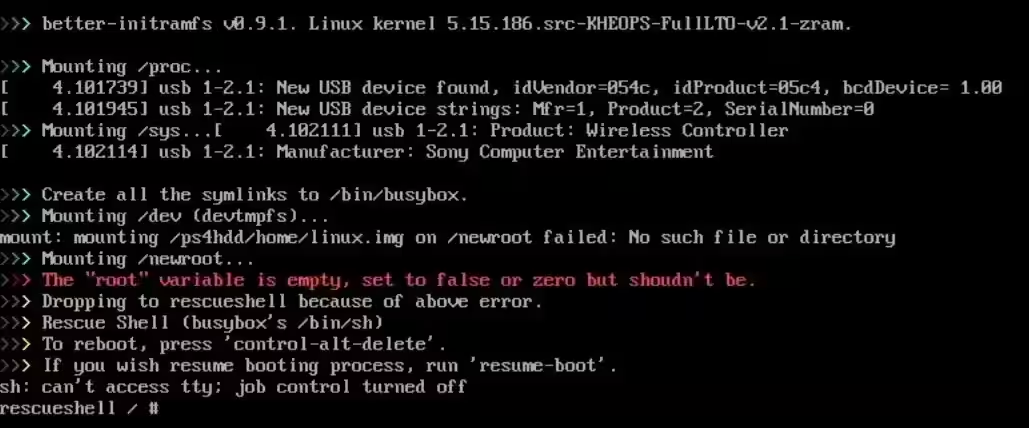
Now that the storage is covered, here comes the moment of truth. You'll be sent to the Rescue Shell, which will look like this:
- Type
install-psxitarch.sh- If it fails, go to the Installation Issues, or use the alternative method.
This could take long depending on your HDD or SSD, on the ps4 HDD it can take roughly about 20 minutes.
After that is done, it should boot into the desktop. If it doesn't, run
bash
resume-bootWARNING
Don't run resume-boot more than twice, or it'll crash the system! Do CTRL+ALT+DELETE to reboot instead!